Monday, May 30, 2011

:: thank you touch n go ::

May is the toughest month for us this year. Only a day left for June to arrive and hopefully a new month brings us better luck, rezeki and joy. Despite the bad news and challenges something (finally) made me a bit happy. Last Friday I went out with Nor so I dropped by at the NPE office on my way back to get my Touch n Go rebate. It has been a while since I last received the rebate so I was just trying my luck and surprisingly I got this:

My rebate amount is RM129.44!

To me that is one big amount and I felt great because I didn't expect that at all. Alhamdulillah, rezeki and at least it can cover a month of toll expenses to the hospital later, in fact it is more than enough.

In case you didn't know, Malaysian Government started the 20% toll rebate programme for frequent Touch n Go users since September 2009 in which users have to use their Touch n Go for minimum of 80 times a month to qualify. Basically, to get 80 transactions per month means you have to use the toll 4 times daily so you will automatically qualify if you are using the NPE to work from end to end like me. Before anything, users will have to register first at https://privilege.touchngo.com.my/ and 20% rebate will be given out of transaction amount in that particular month which users could redeem from Touch N Go card reload centres nationwide. 

Government has increased the fuel price, electricity tariff and many other things so better grab this opportunity before they decided to stop it.

*keywords: rebet touch n go

Thursday, May 26, 2011

:: free mini lipice ::

I am a LipIce loyal user since univ days and a tube of LipIce Fruity lip balm is a must have item inside my handbag. It never fails to moisturise my lips and I personally believe it also protects them from darkening even though I've been wearing lipstick almost everyday for years. Their lip balm comes in 4 fruity flavours which are strawberry, grape, apple and lemon... and my favourites are strawberry and apple. Not only that, I also like wearing LipIce Sheer Colour which automatically turns my lips into natural pink without the need of wearing any lipstick. 

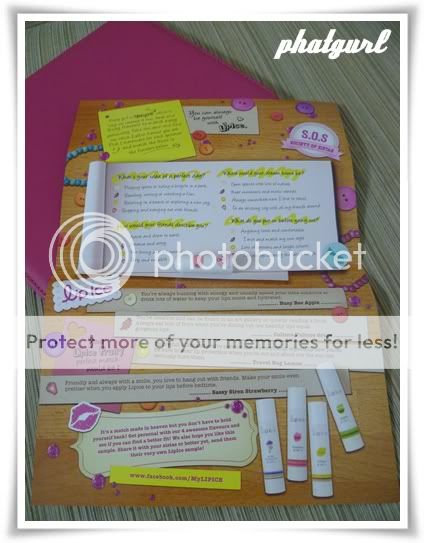
Last month LipIce Malaysia on their Facebook page launched an app called Society of Sistas which allow their fans to send cute photo message of themselves with their sisters or BFFs. Just upload a pic, decorate with available stickers and wallpapers, write a personalised message and send it to your sisters or BFFs. Best part of all is receiving a FREE mini LipIce in your mailbox like what I got 2 weeks ago:

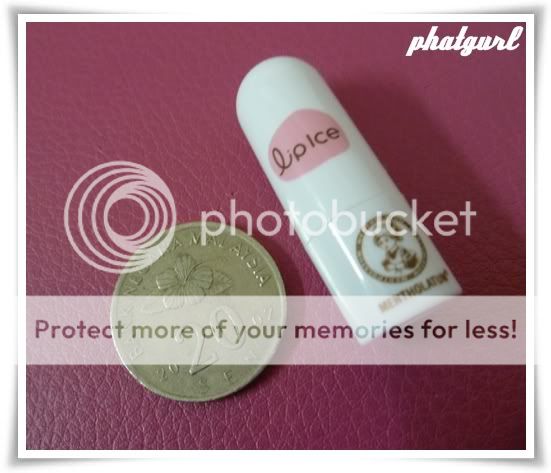
Can you see the tiny mini LipIce Fruity?

How cute it is when compared to a 20 cents coin

Wanna have your own mini LipIce fruity? Fret not cuz LipIce Malaysia just announced last Monday that Society of Sistas is back!


Just like their page, join the app and wait for the mini LipIce to arrive in your mailbox. Thank you LipIce. Muahx!

Wednesday, May 25, 2011

:: simple satisfying dinner ::

If you are a regular visitor to this blog, you must have noticed I like cooking simple dishes. The truth is, I'm not a good cook and when I'm alone at home I prefer having something simple yet able to fulfill my hunger. To me simple means easy and quick to be prepared, just like my all time favourite dish; baked / jacket potato which only takes 5 minutes preparation time.

I only ate a bowl of cereal and nestum for brunch today. Late in the evening just now my hunger pangs arrived so I made myself a simple dinner from whatever available in the kitchen:

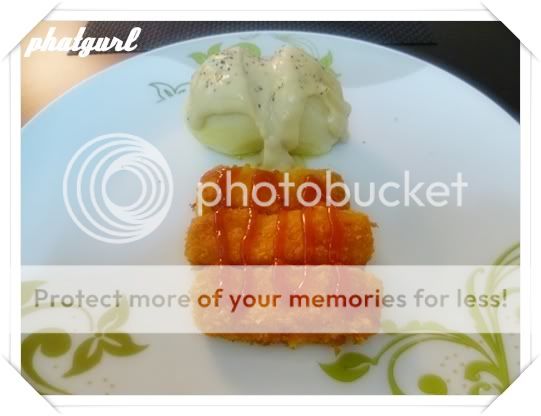
Marina brand Fish Fingers, the best fish fingers in town + russet potato + cream of mushroom

*Prep time: 15 minutes

*Steps:
- Heat the pan and boil some water while peeling the potato
- Cook the potato in the microwave for 3 and a half minutes
- Fry the fish fingers
- Make thick batter for gravy by mixing together cream of mushroom and boiling water
- Slice the potato, insert some butter in the middle, pour gravy and shake some pepper on top

End Result:
Golden Fish Fingers with Potato and Gravy

It took me 10 minutes to clear 'em all.
Simple and Simply Delicious!

:: now i know ::

I was browsing through my "photos of you" album in my Facebook profile and found these pics:

 
The first photo was taken in July 2010 during hubby's friend's wedding meanwhile the second photo was taken in October 2010 with our friends / hosts in Melbourne. 

Looking at those photos made me realised of something...


...it's nothing important...


...yeah, nothing much...


...except...


...I just realised how slim I was before! :-D


The BIG question now is, could I shed these extra KGs after giving birth? Hrmmm...do wish me luck!

Tuesday, May 24, 2011

:: how to make paper napkin dress ::

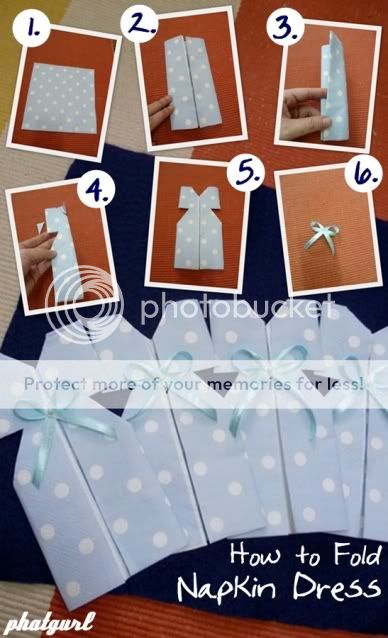
Here is another baby shower related tutorial for all of you. When I Googled napkin fold for baby shower, most of the ideas were diaper shape napkin but since I didn't buy any napkin pin to complete the look I continued my search and found this tutorial at HowDoesShe.

It's paper napkin dress and making one is effortlessly easy. Not only for baby shower, this dress-shaped napkin is also perfect to complete your table arrangement for bridal shower, casual tea party, birthday party or japanese-themed party (since the dress looks like a kimono). 


What you need:
- Paper napkins
- Ribbons / Beads for decoration
- Scissors

> Step 1: Take one paper napkin

> Step 2: Fold each side of the napkin to the center

> Step 3: Fold it into half

> Step 4: Cut a triangle shape at the side for arms and on top for neckline

> Step 5: Open the fold and you have a dress!

> Step 6: Make a bow with a ribbon and glue it in the middle of the dress. Add a bead to enhance the look and it's all done ;-)

Footnote: just prepare plain napkins in case your guests found the napkin is too adorable and cute to wipe their mouths with. Well, my guests did... happy trying!

*keywords: napkin fold for baby shower, napkin fold idea, how to fold a napkin into a dress, napkin fold for bridal shower, napkin fold for birthday party, cute napkin fold, napkin fold tutorial, napkin dress tutorial, baby shower ideas

:: tutorial-cute soother favor for baby shower ::

It has been a while since I last made a handmade craft project so I was pretty excited to make one for my baby shower tea party - just for fun. At first I planned to make a burp cloth cupcake but thought it wasn't baby-related enough so out of nowhere I somehow got this idea of making the favor using baby soother. I prefer giving away an item instead of food so my guests could keep it and who knows they will need it for whatever reason later.

As promised in my previous entry, here's the step-by-step guide to make a cute soother favor for a baby shower. By the way, I chose blue because I'm carrying a baby boy so you could make yours according to baby gender or party colour theme ;-)

Items Required:
- Baby soother
- Plastic container (another option is transparent box)
- Paper napkin
- Printed / coloured paper
- Ribbons
- Beads (other options are sequins, crystals, etc)
- Glue
- Scissors


> Step 1: Crumple a napkin into the container.

> Step 2: Make paper curls out of printed / coloured paper by cutting them into thin strips. With sharp end of the scissors, pull the paper from end to end with a sliding motion to create a curl. Put some inside the container. 

> Step 3: Make a bow with a ribbon. Fold it into number 8 and glue in the middle. 

> Step 4: Glue the bow on soother's handle. 

> Step 5: Wrap the bow with another ribbon in the middle and add a bead to enhance it. 

> Step 6: Place the soother inside the container.

(*idea: you could also place a small thank you note inside the container)


Items for Finishing:
- Transparent cling wrap
- Plastic container cover
- Ribbon


> Step 7: Measure and place the cling wrap on top of the container. 

> Step 8: Wrap and secure the cling wrap tightly around the container (*note: pretty tricky - require lots of patience). 

> Step 9: Glue the cover below the container as a base and decorate with ribbon and beads according to preference. 


You now have a cute soother favor for your guests. Perfect for baby shower or any kind of baby-related events. Good luck!

*keywords: baby shower favor tutorial, favour tutorial, homemade baby shower favor, homemade baby shower gift, homemade baby shower idea, what to give guests for baby shower, how to make paper confetti, how to make paper curler, cute gift for baby shower, cute favor for baby shower, how to make baby shower favor

Monday, May 23, 2011

:: my baby shower tea party ::

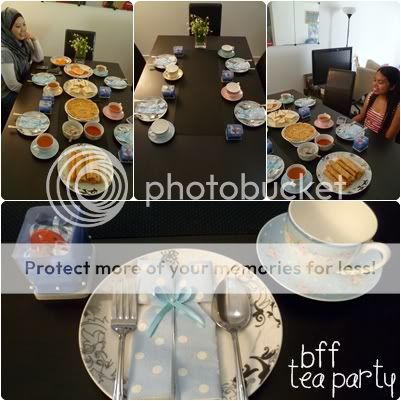
Last Saturday we were having a simple baby shower tea party at my house. There were only 4 of us as usual; Fila, Nor, Rabby and myself. Rynn was supposed to join us too but she had to cancel her attendance last minute because her daughter got chicken pox. The session was not really a baby shower though but it was more like our usual 'makan-makan' and gossiping session so it was more like a BFF Tea Party instead ;-)


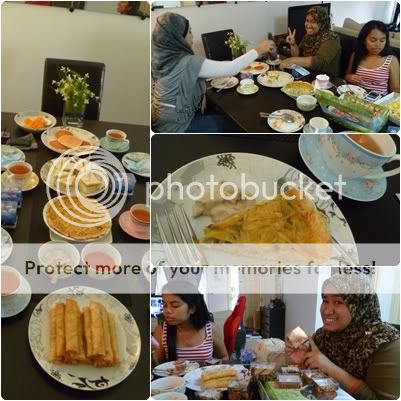
Although it was just a simple party with the same attendees, I still wanted to create nice ambience to cherish the moment so I set a simple table arrangement for all of us. I have always wanted to use the cute, colourful fine bone china tea set we got as wedding present and I finally managed using them. They were 4 set of cups and saucers in 4 different colours; blue, pink, green and yellow. Not only that, I also googled and made special napkin fold in a shape of a shirt; and not forgetting a baby shower themed door gift for everyone. Honestly, I was really into these kind of stuff and really enjoyed making them.


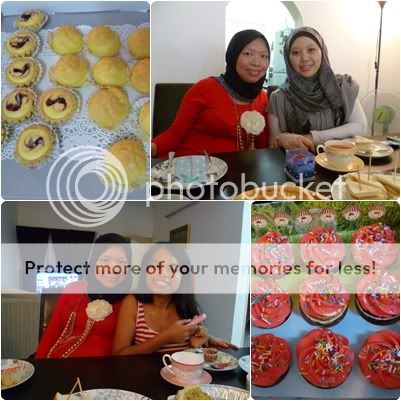
Nor was the first to arrive. Rabby then came with her homemade quiche and followed by Fila who arrived with her club sandwich and popia. I only made pancakes, served with peaches in syrup and hershey's chocolate... and also strawberry flavoured tea for the drinks. At first we started eating without Nor because she had to collect desserts that she have ordered. The three of us were already 3/4 full when Nor returned with 12 cupcakes, 10 creampuffs and 7 blueberry cheese tarts. It was food heaven, enuff said!

 
I was wearing my new Diva necklace. Over & 'meriah' but I like! ;-)


We didn't do anything else except eating and chatting at the dining table for few hours, but it was fun to me. I always love spending time with my besties and these are the few people who I rely the most after hubby and family, among the few who never fail giving their endless support in any condition. We could just sit, eat and talk for many hours and actually this tea party was our third gathering within a week. On Wesak public holiday, I invited Fila and Rabby for lunch and we were eating and chatting at the dining table for almost 7 hours non-stop without realising it. Two days later, Nor came with Fila for dinner and there goes another brief eating and chatting session. This tea party was the third eating and chatting session... and yes, we do have a lot to talk about all the time... hehehe.

So, that was it. To all my BFFs, thank you so much for the great company + great food. Really appreciate the friendship and thank you for always being there *hugs*.

Next I will share the step-by-step guide for the napkin fold and also for the baby shower door gift in case anybody is interested. Just wait and see... In the meantime, toodles and take care!
Related Posts Plugin for WordPress, Blogger...